Schedule a Workflow Execution
There are different ways to launch the execution of a workflow. In previous articles, we mentioned that you can use the gcloud command-line tool to create an execution, you can also use the various client libraries to invoke Workflows, or use the REST API. A workflow itself can also invoke other workflows!
But today, I’d like to tell you how to schedule the execution of a workflow. For that purpose, we’ll take advantage of Cloud Scheduler. The documentation is actually covering this topic in detail, so be sure to grab all the info there. However, I’ll go quickly through the steps, and tell you about a nice new feature in the cloud console to ease the scheduling of workflows!
First, you need to have both Workflows and Cloud Scheduler enabled:
gcloud services enable cloudscheduler.googleapis.com workflows.googleapis.com
Cloud Scheduler will need a service account with workflows.invoker role, to be allowed to call Workflows:
gcloud iam service-accounts create workflows_caller_sa
gcloud projects add-iam-policy-binding MY_PROJECT_ID \
  --member serviceAccount:workflows_caller_sa@MY_PROJECT_ID.iam.gserviceaccount.com \\
  --role roles/workflows.invoker
Now it’s time to create the cron job:
gcloud scheduler jobs create http every_5_minute_schedule \
    --schedule="*/5 * * * *" \
    --uri="https://workflowexecutions.googleapis.com/v1/projects/MY_PROJECT_ID/locations/REGION_NAME/workflows/WORKFLOW_NAME/executions" \
    --message-body="{\"argument\": \"DOUBLE_ESCAPED_JSON_STRING\"}" \
    --time-zone="America/New_York" \
    --oauth-service-account-email="workflows_caller_sa@MY_PROJECT_ID.iam.gserviceaccount.com"
Here, you can see that Scheduler will run every 5 minutes (using the cron notation), and that it’s going to call the Workflows REST API to create a new execution. You can also pass an argument for the workflow input.
The cool new feature I was eager to mention today was the direct integration of the scheduling as part of the Workflows creation flow, in the cloud console.
Now, when you create a new workflow, you can select a trigger:
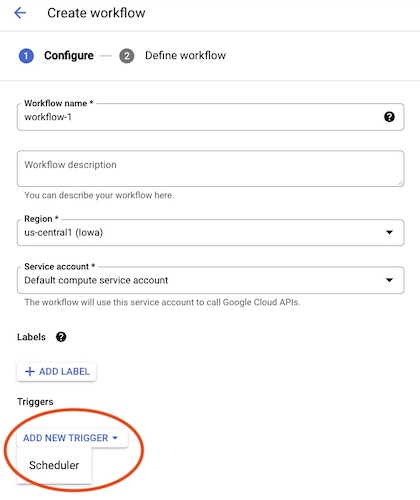
Click on the ADD NEW TRIGGER button, and select Scheduler. A side panel on the right will show up, and you will be able to specify the schedule to create, directly integrated, instead of having to head over to the Cloud Scheduler product section:
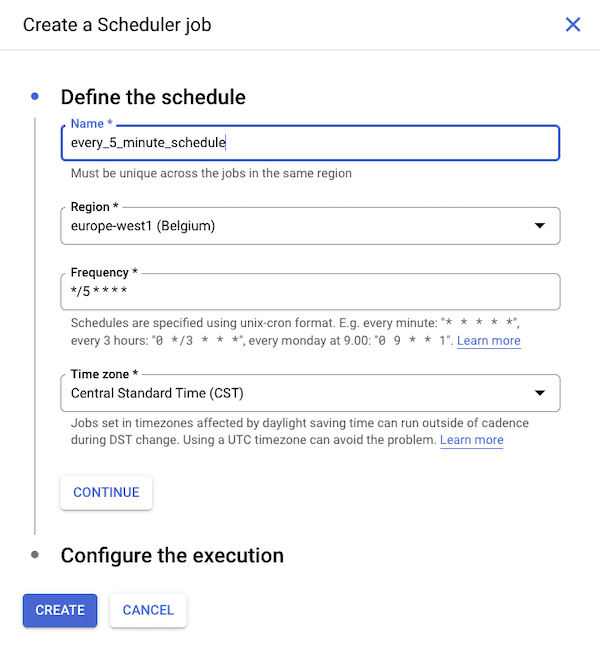
And there, you can specify the various details of the schedule! It’s nice to see both products nicely integrated, to ease the flow of creating a scheduled workflow.