Image generation with Imagen and LangChain4j

This week LangChain4j, the LLM orchestration framework for Java developers, released version 0.26.1, which contains my first significant contribution to the open source project: support for the Imagen image generation model.
Imagen is a text-to-image diffusion model that was announced last year. And it recently upgraded to Imagen v2, with even higher quality graphics generation. As I was curious to integrate it in some of my generative AI projects, I thought that would be a great first contribution to LangChain4j.
At the time of this writing, image generation is still only for allow-listed accounts.
Furthermore, to run the snippets covered below, you should have an account on Google Cloud Platform,
created a project, configured a billing account, enabled the Vertex AI API,
and authenticated with the gcloud SDK and the command:
gcloud auth application-default login.
Now let’s dive in how to use Imagen v1 and v2 with LangChain4j in Java!
Generate your first images
In the following examples, I’m using the following constants, to point at my project details, the endpoint, the region, etc:
private static final String ENDPOINT = "us-central1-aiplatform.googleapis.com:443";
private static final String LOCATION = "us-central1";
private static final String PROJECT = "YOUR_PROJECT_ID";
private static final String PUBLISHER = "google";
First, we’re going to create an instance of the model:
VertexAiImageModel imagenModel = VertexAiImageModel.builder()
    .endpoint(ENDPOINT)
    .location(LOCATION)
    .project(PROJECT)
    .publisher(PUBLISHER)
    .modelName("imagegeneration@005")
    .maxRetries(2)
    .withPersisting()
    .build();
There are 2 models you can use:
imagegeneration@005corresponds to Imagen 2imagegeneration@002is the previous version (Imagen 1)
In this article, we’ll use both models. Why? Because currently Imagen 2 doesn’t support image editing, so we’ll have to use Imagen 1 for that purpose.
The configuration above uses withPersisting() to save the generated images in a temporary folder on your system.
If you don’t persist the image files, the content of the image is avaiable as Base 64 encoded bytes in the Images objects returned.
You can also specify persistTo(somePath) to specify a particular directory where you want the generated files to be saved.
Let’s create our first image:
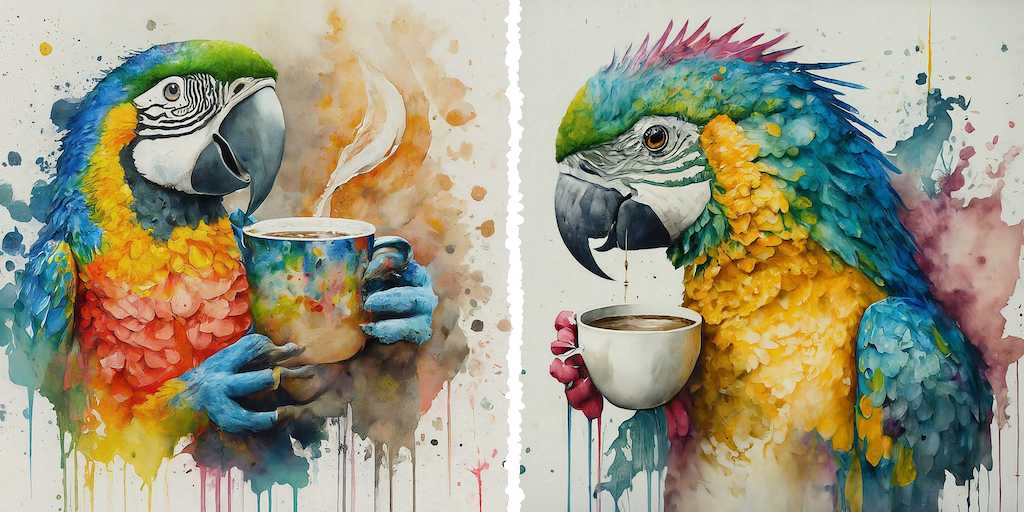
Response<Image> imageResponse = imagenModel.generate(
    "watercolor of a colorful parrot drinking a cup of coffee");
The Response object wraps the created Image.
You can get the Image by calling imageResponse.getContent().
And you can retrieve the URL of the image (if saved locally) with imageResponse.getContent().url().
The Base 64 encoded bytes can be retrieved with imageResponse.getContent().base64Data()
Some other tweaks to the model configuration:
- Specify the language of the prompt:
language("ja")(if the language is not officially supported, it’s usually translated back to English anyway). - Define a negative prompt with things you don’t want to see in the picture:
negativePrompt("black feathers"). - Use a particular seed to always generate the same image with the same seed:
seed(1234L).
So if you want to generate a picture of a pizza with a prompt in Japanese, but you don’t want to have pepperoni and pineapple, you could configure your model and generate as follows:
VertexAiImageModel imagenModel = VertexAiImageModel.builder()
        .endpoint(ENDPOINT)
        .location(LOCATION)
        .project(PROJECT)
        .publisher(PUBLISHER)
        .modelName("imagegeneration@005")
        .language("ja")
        .negativePrompt("pepperoni, pineapple")
        .maxRetries(2)
        .withPersisting()
        .build();

Response<Image> imageResponse = imagenModel.generate("ピザ"); // pizza
Image editing with Imagen 1
With Imagen 1, you can edit existing images:
- mask-based editing: you can specify a mask, a black & white image where the white parts are the corresponding parts of the original image that should be edited,
- mask free editing: where you just give a prompt and let the model figure out what should be edited on its own or following the prompt.
When generating and editing with Imagen 1, you can also configure the model to use a particular style (with Imagen 2, you just specify it in the prompt) with sampleImageStyle(VertexAiImageModel.ImageStyle.photograph):
photographdigital_artlandscapesketchwatercolorcyberpunkpop_art
When editing an image, you may wish to decide how strong or not the modification should be, with .guidanceScale(100).
Usually, between 0 and 20 or so, it’s lightly edited, between 20 and 100 it’s getting more impactful edits, and 100 and above it’s the maximum edition level.
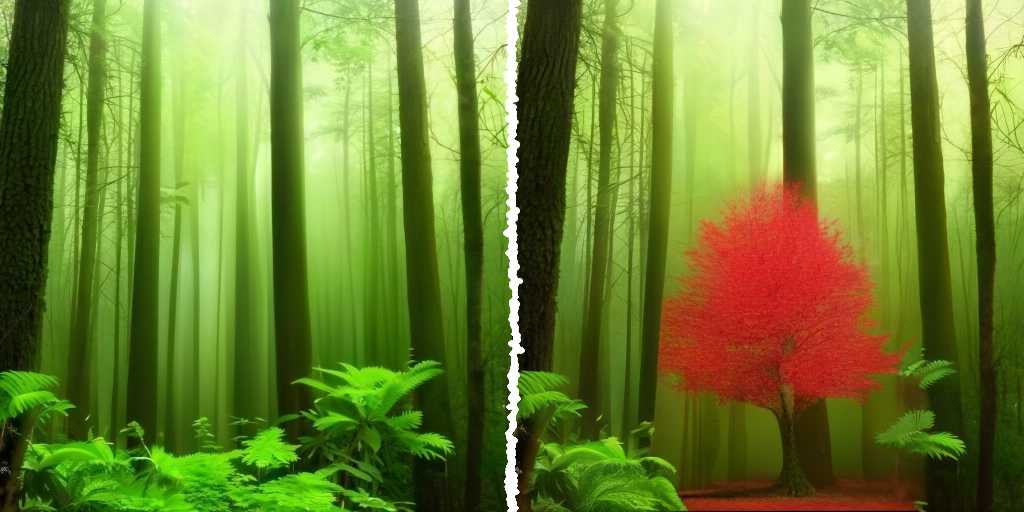
Let’s say I generated an image of a lush forrest (I’ll use that as my original image):
VertexAiImageModel model = VertexAiImageModel.builder()
        .endpoint(ENDPOINT)
        .location(LOCATION)
        .project(PROJECT)
        .publisher(PUBLISHER)
        .modelName("imagegeneration@002")
        .seed(19707L)
        .sampleImageStyle(VertexAiImageModel.ImageStyle.photograph)
        .guidanceScale(100)
        .maxRetries(4)
        .withPersisting()
        .build();

Response<Image> forestResp = model.generate("lush forest");
Now I want to edit my forrest to add a small red tree in the bottom of the image.
I’m loading a black and white mask image with a white square at the bottom.
And I pass the original image, the mask image, and the modification prompt, to the new edit() method:
URI maskFileUri = getClass().getClassLoader().getResource("mask.png").toURI();

Response<Image> compositeResp = model.edit(
        forestResp.content(),              // original image to edit
        fromPath(Paths.get(maskFileUri)),  // the mask image
        "red trees"                        // the new prompt
);
Another kind of editing you can do is to upscale an existing image. As far as I know, it’s only supported for Imagen v1 for now, so we’ll continue with that model.
In this example, we’ll generate an image of 1024x1024 pixels, and we’ll scale it to 4096x4096:
VertexAiImageModel imagenModel = VertexAiImageModel.builder()
        .endpoint(ENDPOINT)
        .location(LOCATION)
        .project(PROJECT)
        .publisher(PUBLISHER)
        .modelName("imagegeneration@002")
        .sampleImageSize(1024)
        .withPersisting()
        .persistTo(defaultTempDirPath)
        .maxRetries(3)
        .build();

Response<Image> imageResponse =
        imagenModel.generate("A black bird looking itself in an antique mirror");

VertexAiImageModel imagenModelForUpscaling = VertexAiImageModel.builder()
        .endpoint(ENDPOINT)
        .location(LOCATION)
        .project(PROJECT)
        .publisher(PUBLISHER)
        .modelName("imagegeneration@002")
        .sampleImageSize(4096)
        .withPersisting()
        .persistTo(defaultTempDirPath)
        .maxRetries(3)
        .build();

Response<Image> upscaledImageResponse =
        imagenModelForUpscaling.edit(imageResponse.content(), "");
And now you have a much bigger image!
Conclusion
That’s about it for image generation and editing with Imagen in LangChain4j today! Be sure to use LangChain4j v0.26.1 which contains that new integration. And I’m looking forward to seeing the pictures you generate with it! m

